Adding a property in mr.alfred is a structured, multi-step process that ensures your listing is complete, accurate, and ready to connect with OTAs. Depending on your user role, you may be able to edit or only view properties. When in view mode, additional tabs and details become accessible, including booking history, change logs, and the CI/CO tab (merged from Arrival and Operations tabs).
🔗 Related: Getting Started with mr.alfred
🔢 Step 1: Navigate to Property Creation
- Go to
Properties module → Properties submodule - Click the “Create Property” button
- Alternatively, you can duplicate an existing property or copy specific tabs from it when creating a new one
- Use filters and export the list of properties (Excel export respects applied filters such as city, community, or host)

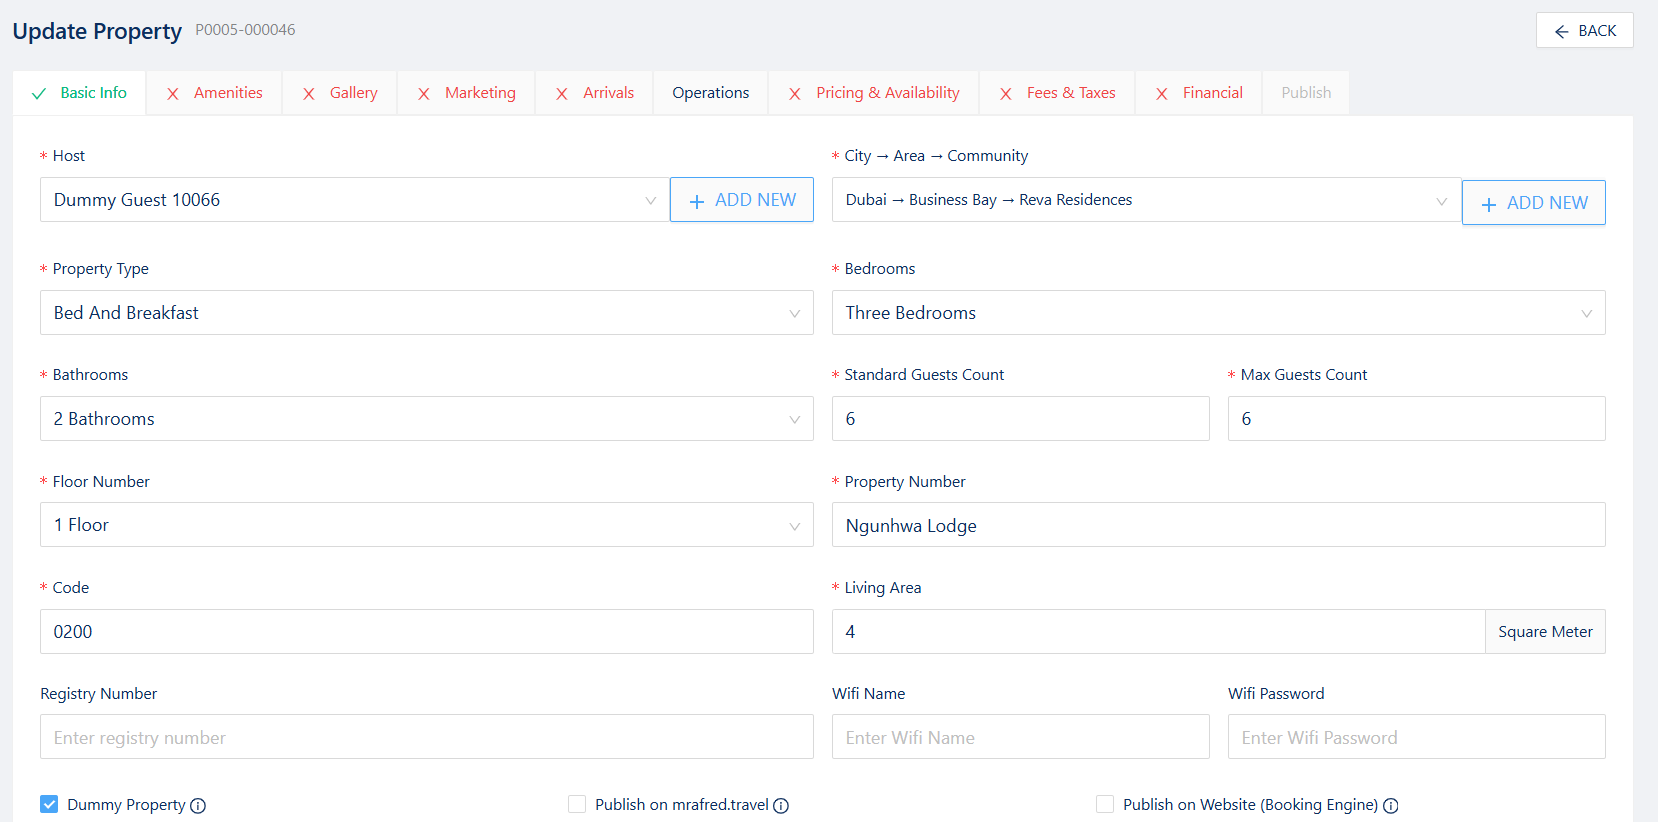
🏢 Step 2: Basic Information
- Assign the property to a Host (property owner)
- If no host exists yet, the system will prompt you to create one
- Choose city, area, and community (or create new ones on the fly)
- Add the property’s commercial name and code
🔗 Related article: Managing Host
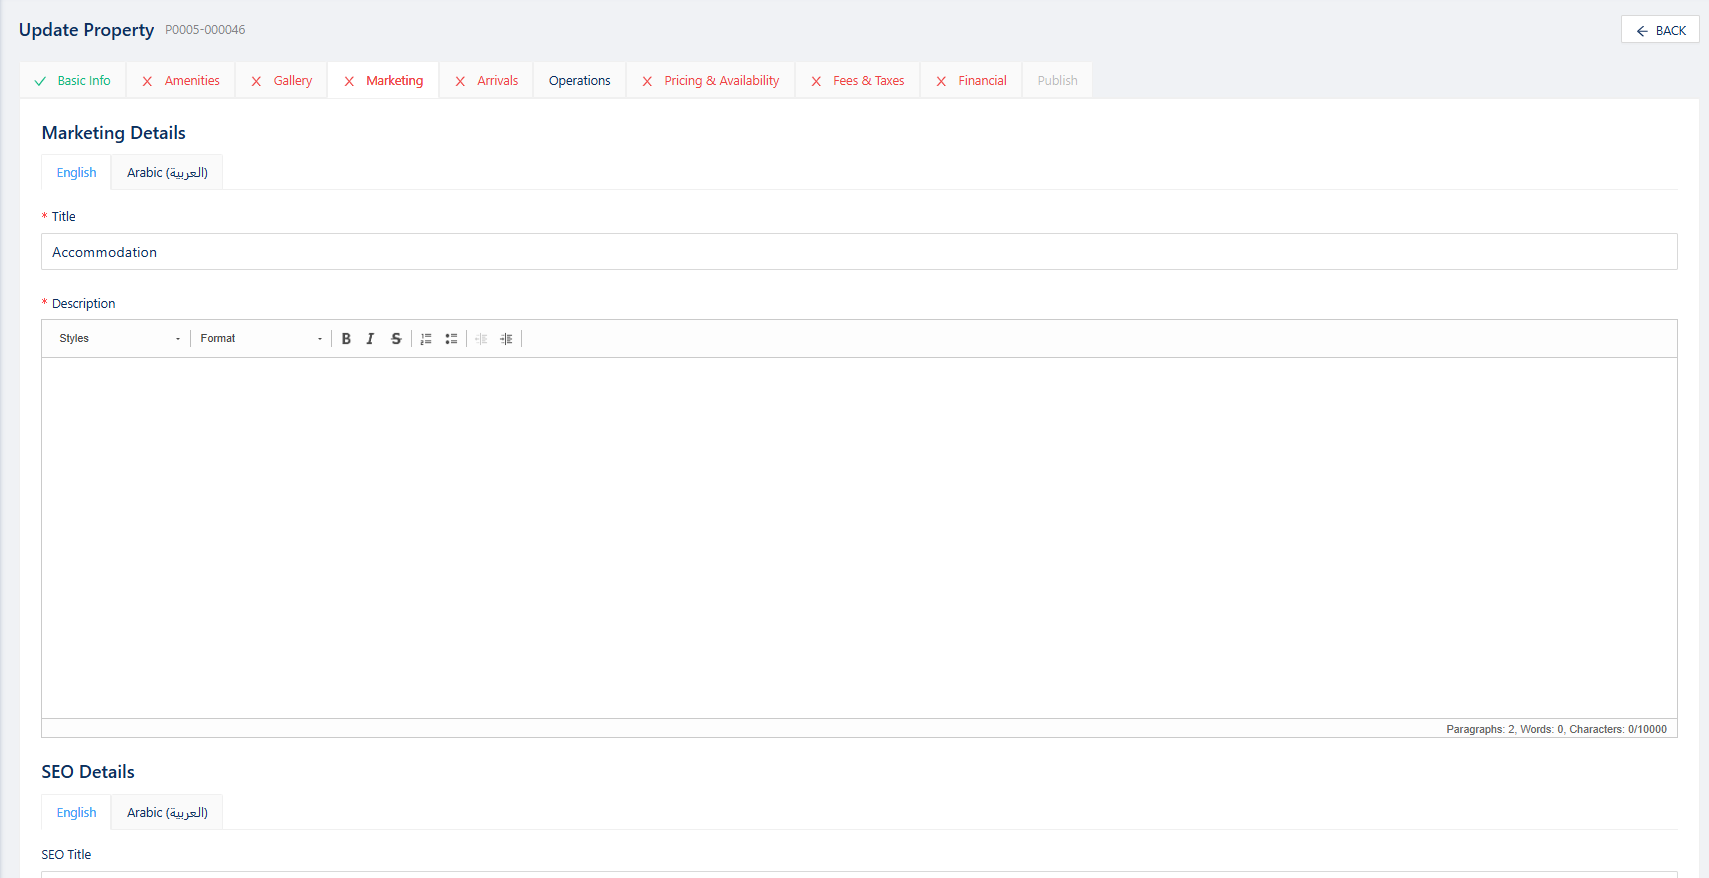
🌍 Step 3: Listing Content (Marketing Tab)
- Add the listing title and description in all active company languages
- Upload and organize property images
- Select amenities and define room distribution
🔗 Related article: (coming soon) Creating listing content & multilingual fields
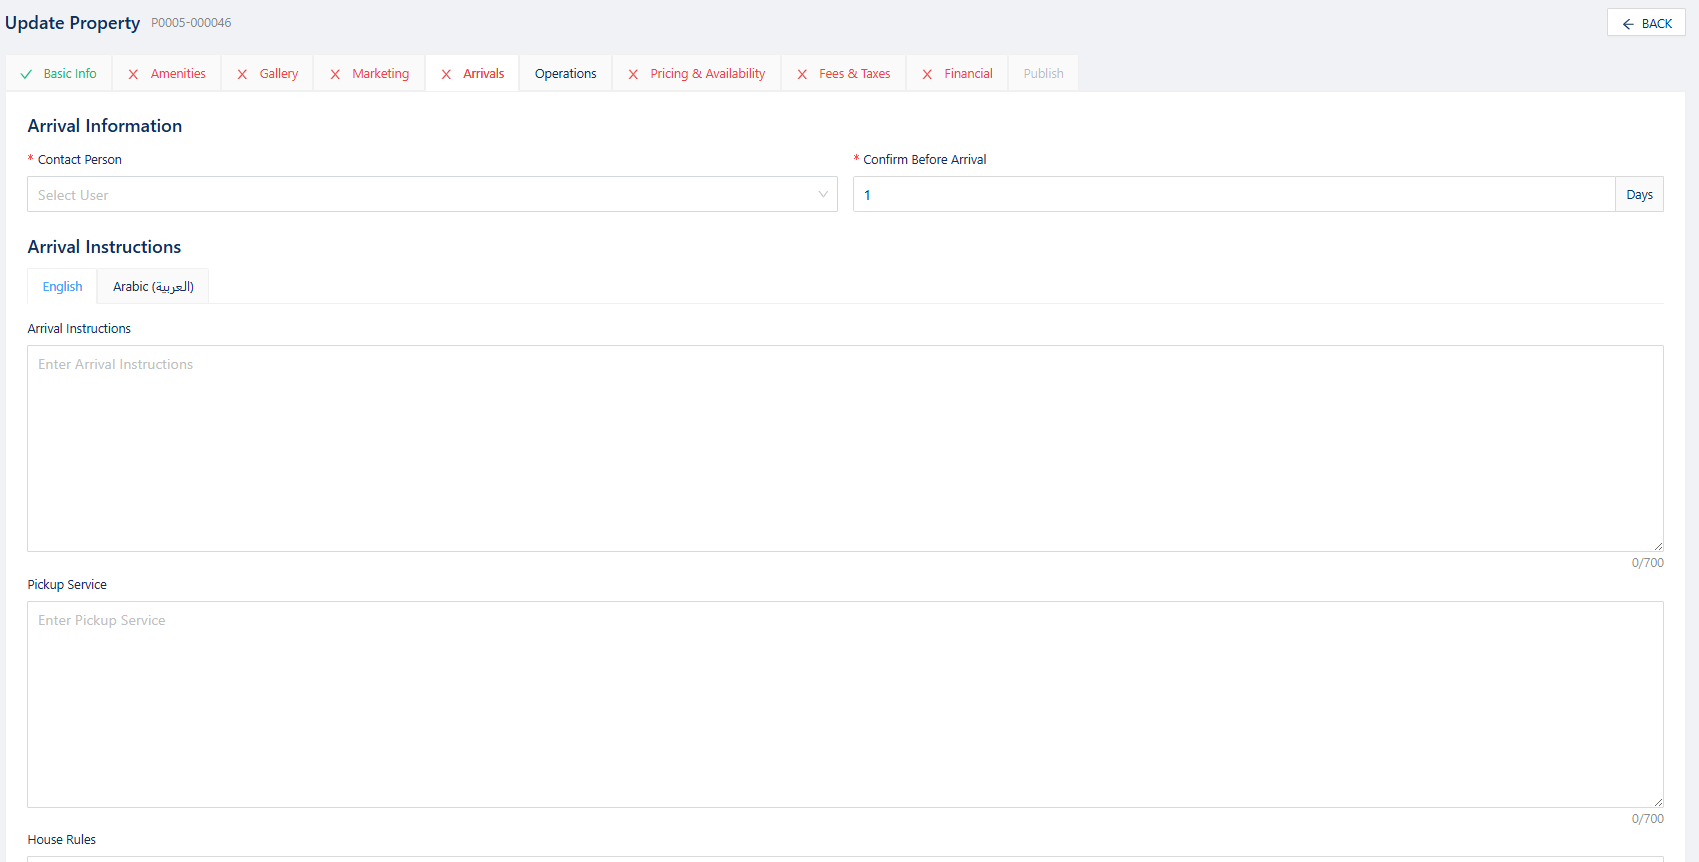
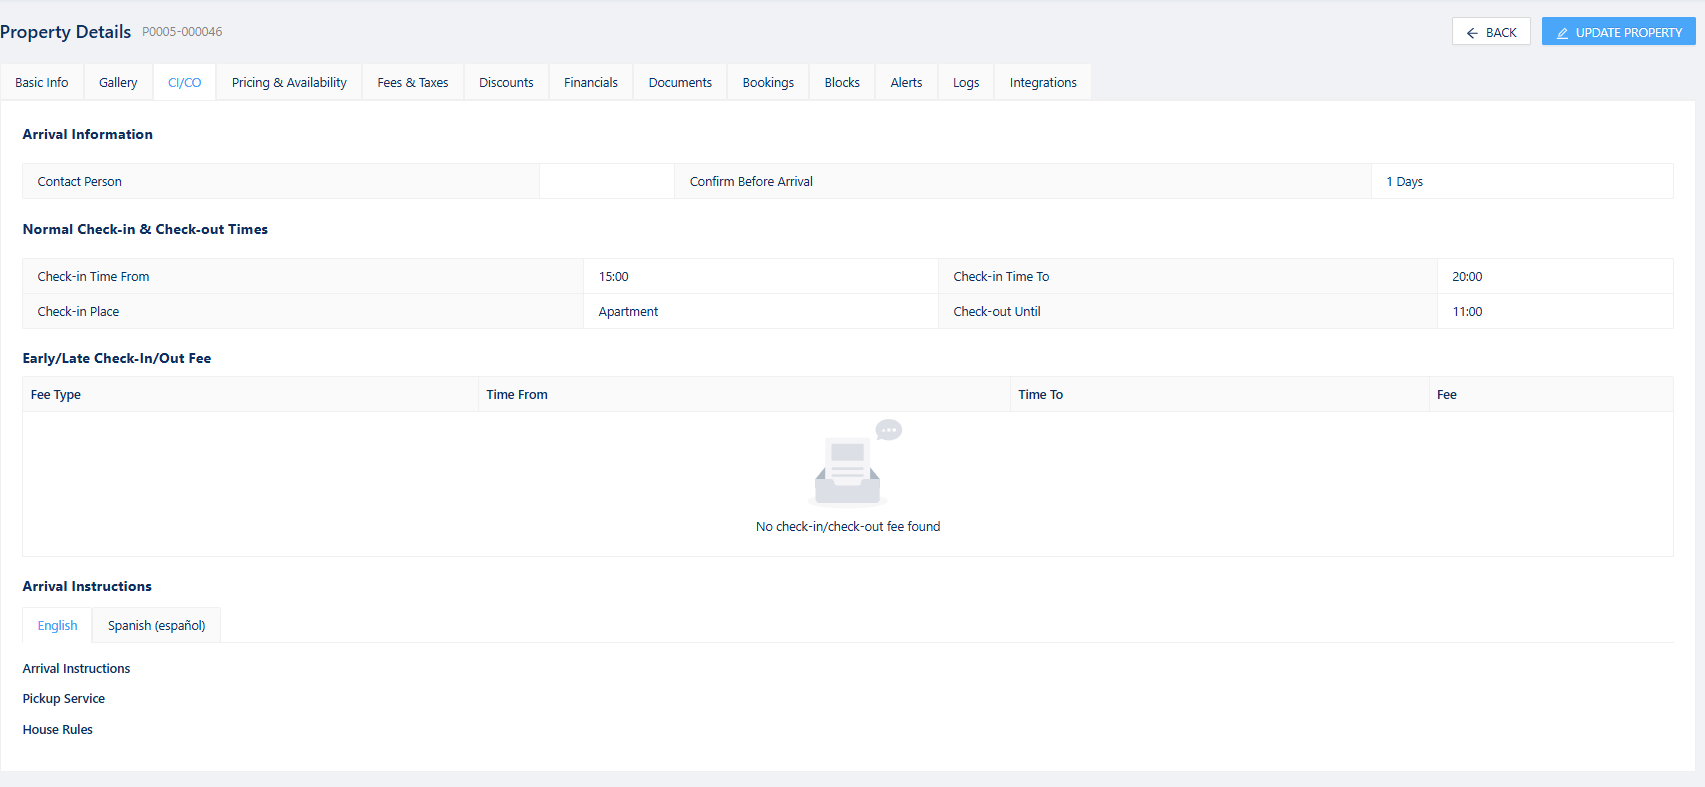
🏛 Step 4: Arrival & Operations
- The Arrival tab is available in Edit mode. It allows you to:
- Add the contact person
- Set arrival instructions
- Define pick-up services (if applicable)
- Add house rules
- All details are available in every language enabled in your account
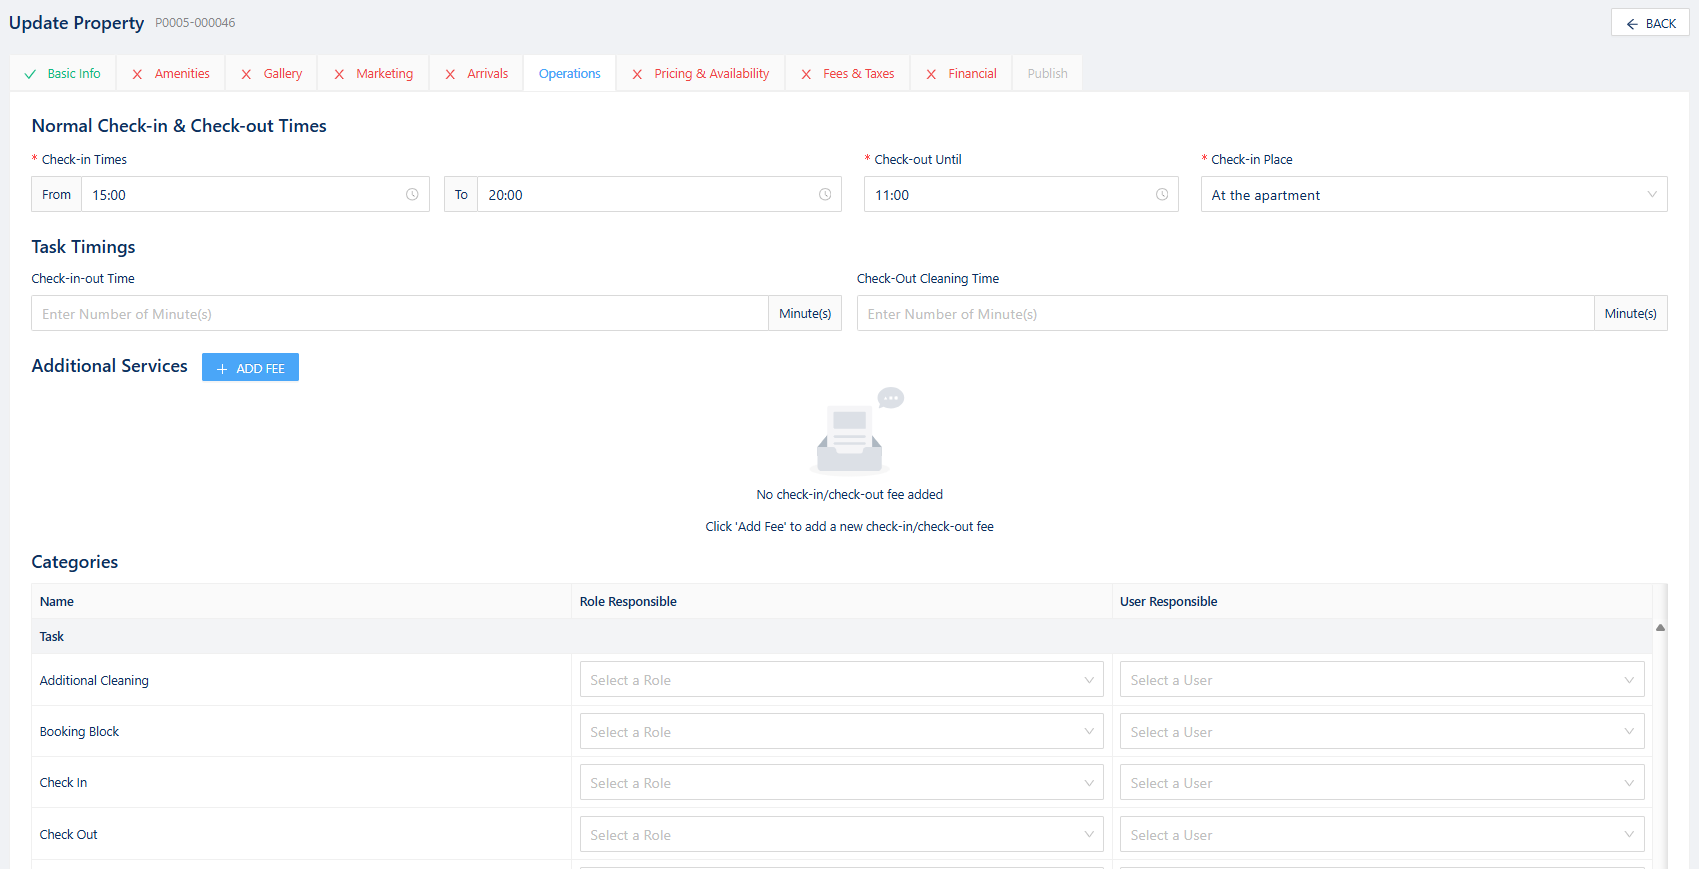
- The Operations tab is also visible in Edit mode:
- Set check-in/check-out times
- Add early check-in, late check-in, late check-out as optional services
- Assign operational tasks to roles and users
- Add basic inventory counts for operations staff
- In View mode, Arrival and Operations are merged and shown under the CI/CO tab.
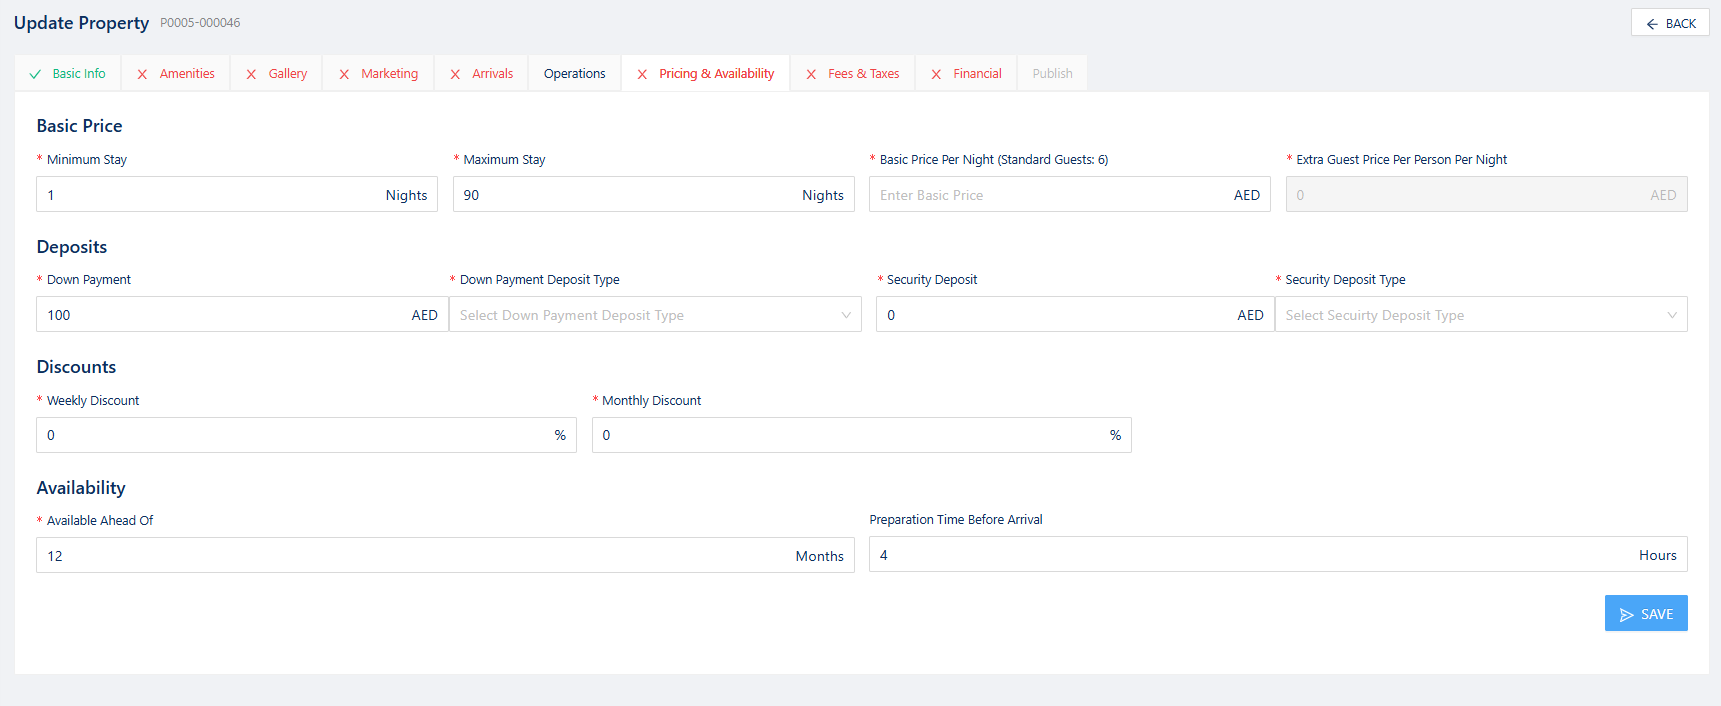
💲 Step 5: Price & Availability
- Set base price, minimum stay, extra guest cost
- Define down payment and security deposit policies
- Configure calendar availability ahead of time (e.g., only allow bookings up to 12 months in advance)
- Set preparation buffer time before arrival
- Add weekly or monthly discounts (other discounts must be configured in Revenue → Discount submodule)
- Below the pricing section, you’ll find a view-only availability calendar (only visible in View mode)
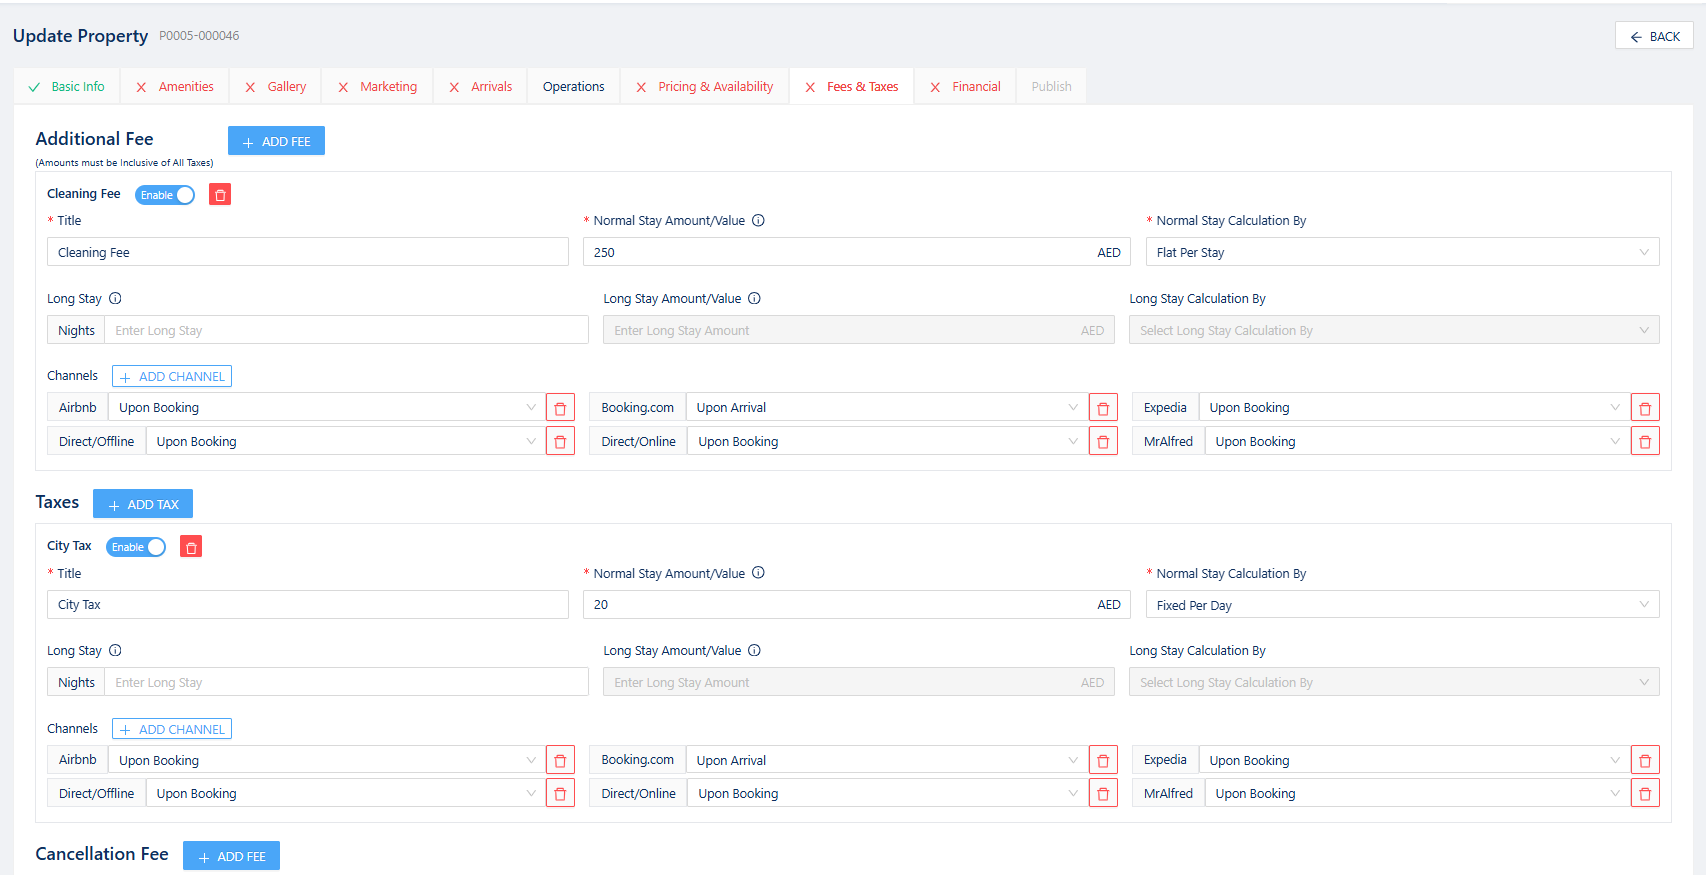
💸 Step 6: Fees & Taxes
- Define service fees, cleaning fees, tourism taxes, etc.
- Specify when and where each fee applies (e.g., upon booking vs. upon arrival)
- Customize per OTA if needed
⚠️ Match your OTA fee/tax setup to avoid booking discrepancies.
🔗 Related article: Configuring fees and taxes in mr.alfred
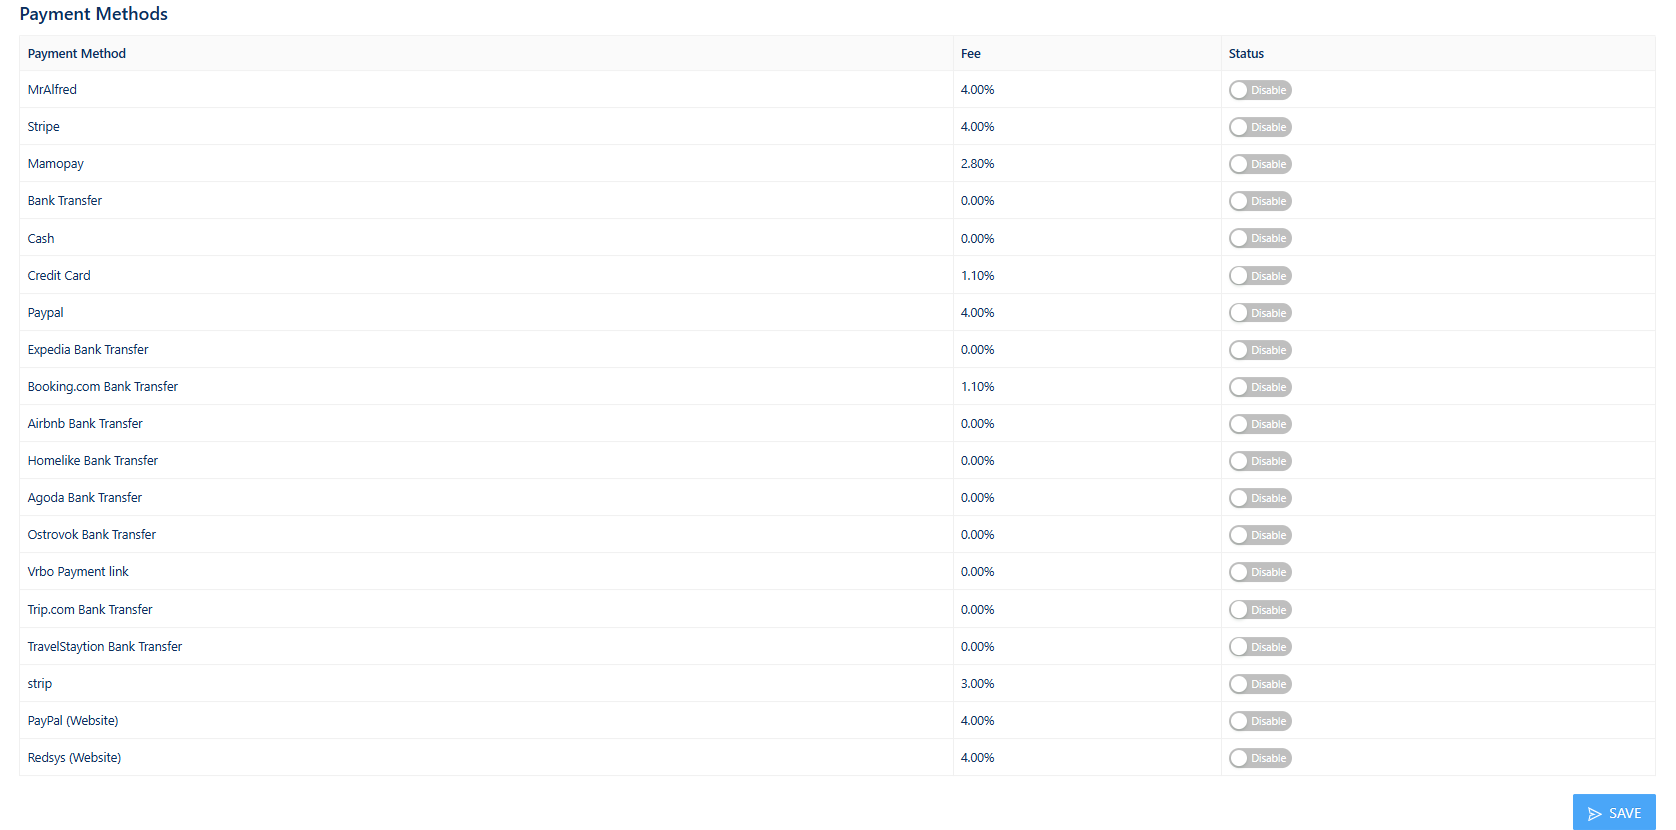
💳 Step 7: Payment Methods
- Select which payment methods are accepted for this specific property
- Options include: Cash, Credit Card, Bank Transfer, B.com Virtual Card, PayPal, Mamopay, Stripe
🔗 Related article: Configuring payment method in mr.alfred
📊 Step 8: Financial Tab
- Set management fee for the property (commission)
- Add fiscal data and any additional fees charged to the owner
🔗 Related article: How to Configure the Finance Module
🗓 Step 9: Booking & Activity Logs (View Mode Only)
- View bookings, blocks, alerts triggered, and change logs related to the property
- You can also add new bookings or blocks when the property is opened in View mode
📦 Step 10: Integrations (View Mode Only)
- View the connection status of Rentals United, checkin.io, and others
- Access and copy the iCal link for this property
🔗 Related article: (coming soon) Using Integrations with Properties
🚨 Publish Tab (Edit Mode Only)
- This tab becomes available only when all required fields are completed
- From here, you can:
- Enable connections to selected OTAs
- Add iCal links from channels like Airbnb
- Add listing URLs for reference
🌐 Bonus: Managing Areas & Communities
- Communities store tower security contact details (used for alerts)
- OTA connections are mapped based on communities, not individual listings
- Communities and areas are also used in reports, revenue management, and map-based guest search
- From the Properties module, you can create and assign cities, areas, and communities, or update existing ones
🔗 Related article: (coming soon) Managing areas and communities or Customizing Alerts
🔗 Need Help?
- 🎓 mr.alfred OS training & tutorials
- ❓ Reach out to your CS rep for hands-on support
Once your property is created, you’re ready to connect it to OTAs via the Sales Channels module.
