👋 Welcome to mr.alfred!
We’re excited to have you onboard! This guide walks you through the essential steps to start using mr.alfred. Since onboarding is handled directly by our Customer Success (CS) team, your experience will be personalized and hands-on.
✅ Before you begin:
Ensure you’ve submitted the following to your Sales representative or CS contact:
- Signed service contract
- Valid business license
- General company information
Once we have this, your account will be created, and initial login credentials will be shared via email.
🔍 Tip: Use this article as your onboarding roadmap — each step links to a detailed guide where you can learn more.
🔐 Step 1: Access Your Account
After setup, you’ll receive login credentials and a link to your dashboard. Your CS rep will also schedule an onboarding call to walk you through the system.
📌 Your dashboard will initially be empty until the rest of the setup is completed.
🛠️ Step 2: Branding & Host App Setup (Handled by CS)
During onboarding, we’ll customize your white-label host app with:
- Company logo
- Brand colors
- Display preferences
🔗 Related article: (coming soon) How to prepare your branding assets for the host app
👥 Step 3: User Roles & Permissions
Our CS team will assist in defining user roles and access levels based on your business needs. Once that’s done, you can:
- Go to:
Admin module → Users submodule - Add individual users
- Assign roles based on position or department (Admin, Housekeeping, etc.)
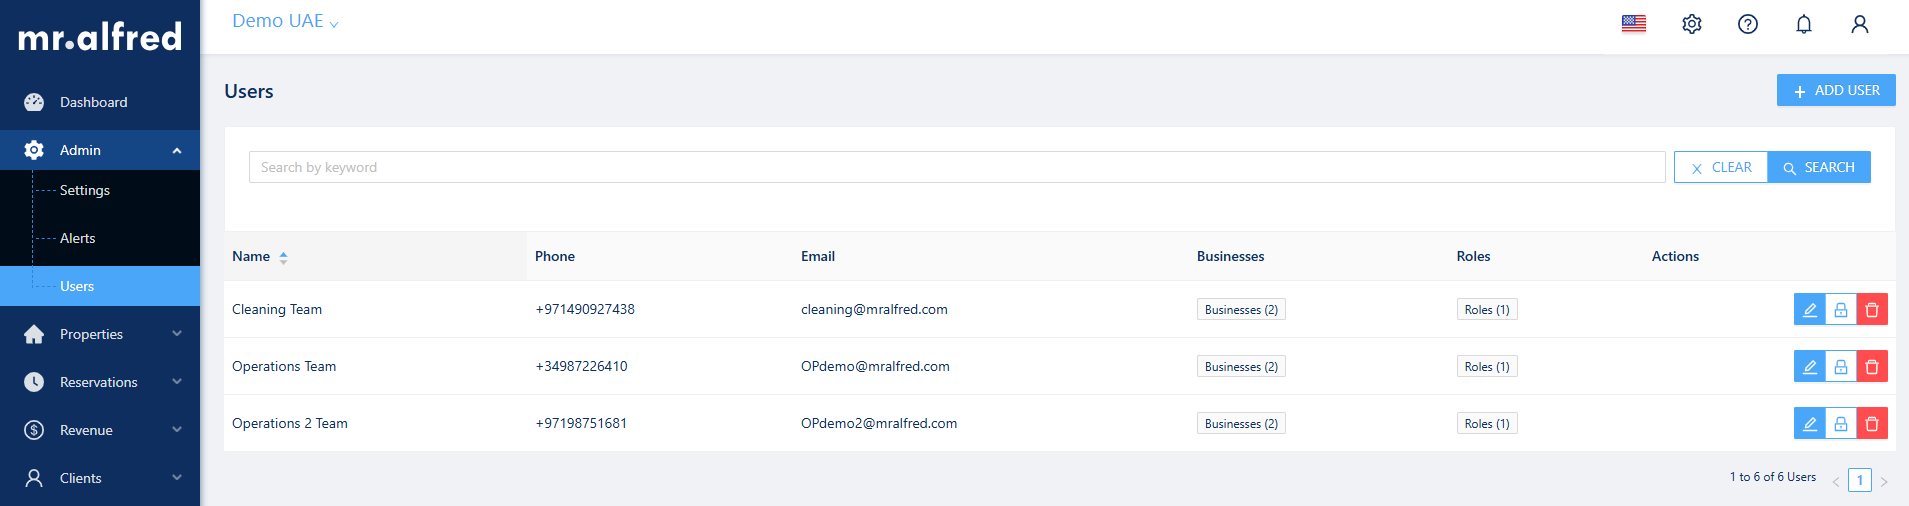
🔗 Related article: Managing users and assigning roles
🏢 Step 4: Add Company Information
This information will be used in invoicing, guest communication, and admin documentation:
- Navigate to:
Admin module → Settings submodule → Business Information tab - Fill in legal name, contact info, VAT ID, etc.
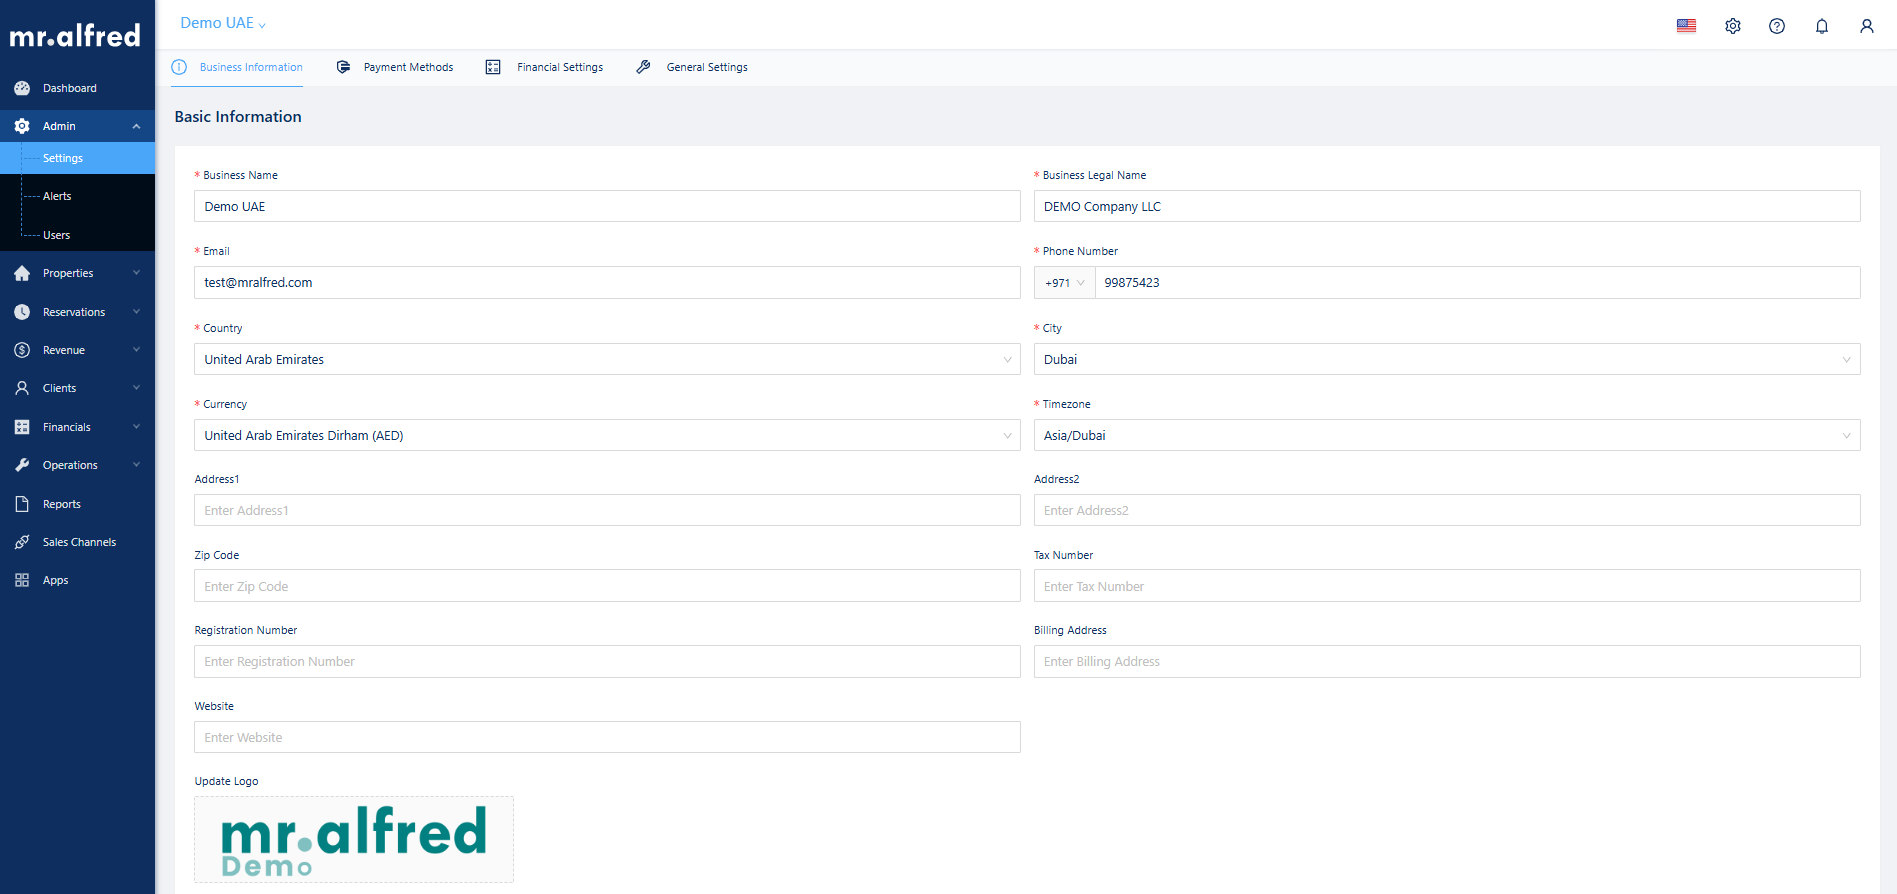
🔗 Related article: Filling in your company details
💳 Step 5: Enable Payment Methods
Set your company’s preferred payment methods so they can later be linked to each property.
- Go to:
Admin module → Settings → Payment Methods - Enable options like: Cash, Credit Card, Bank Transfer, B.com Virtual Card, PayPal, Mamopay, Stripe
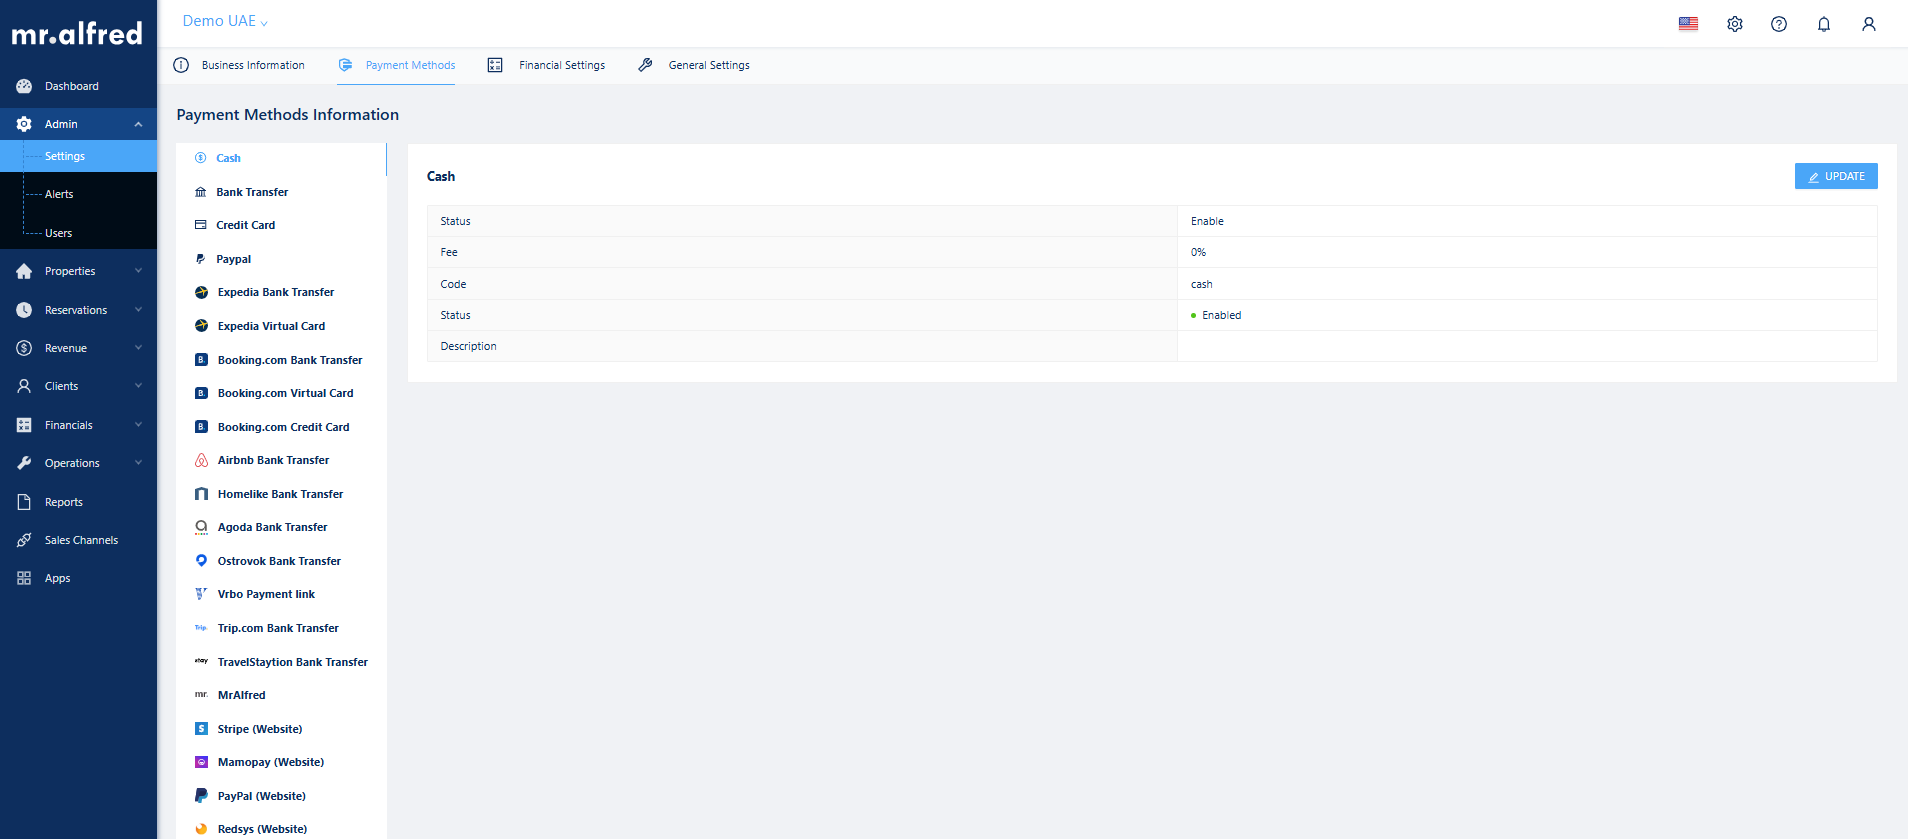
🔗 Related article: Setting up your payment methods
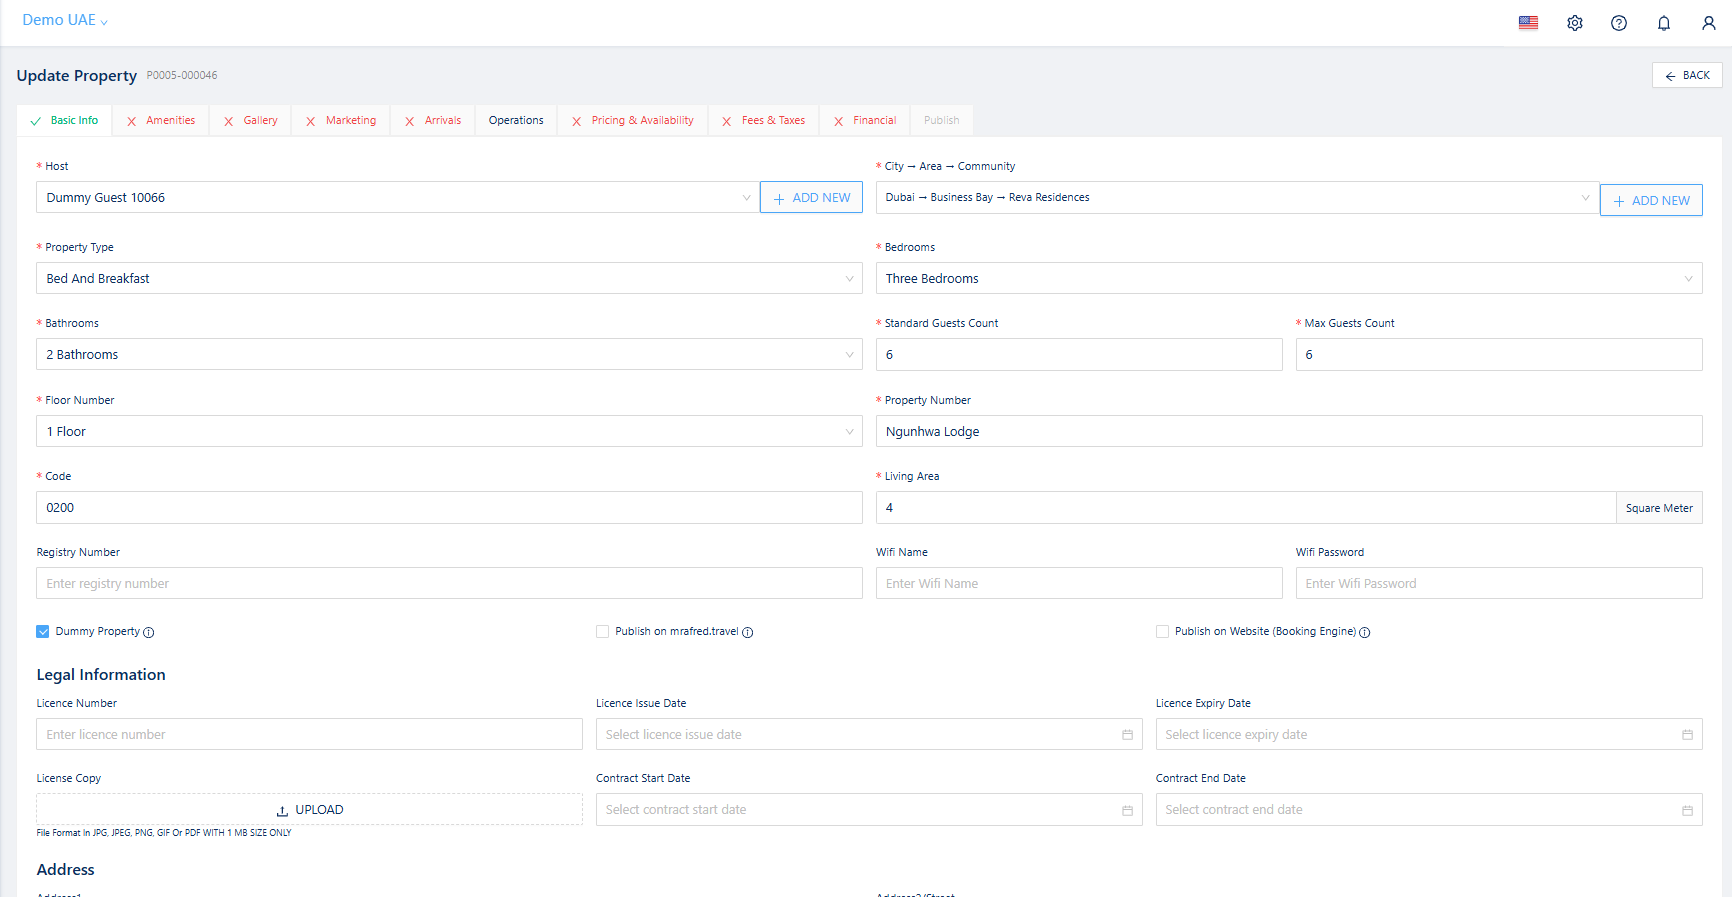
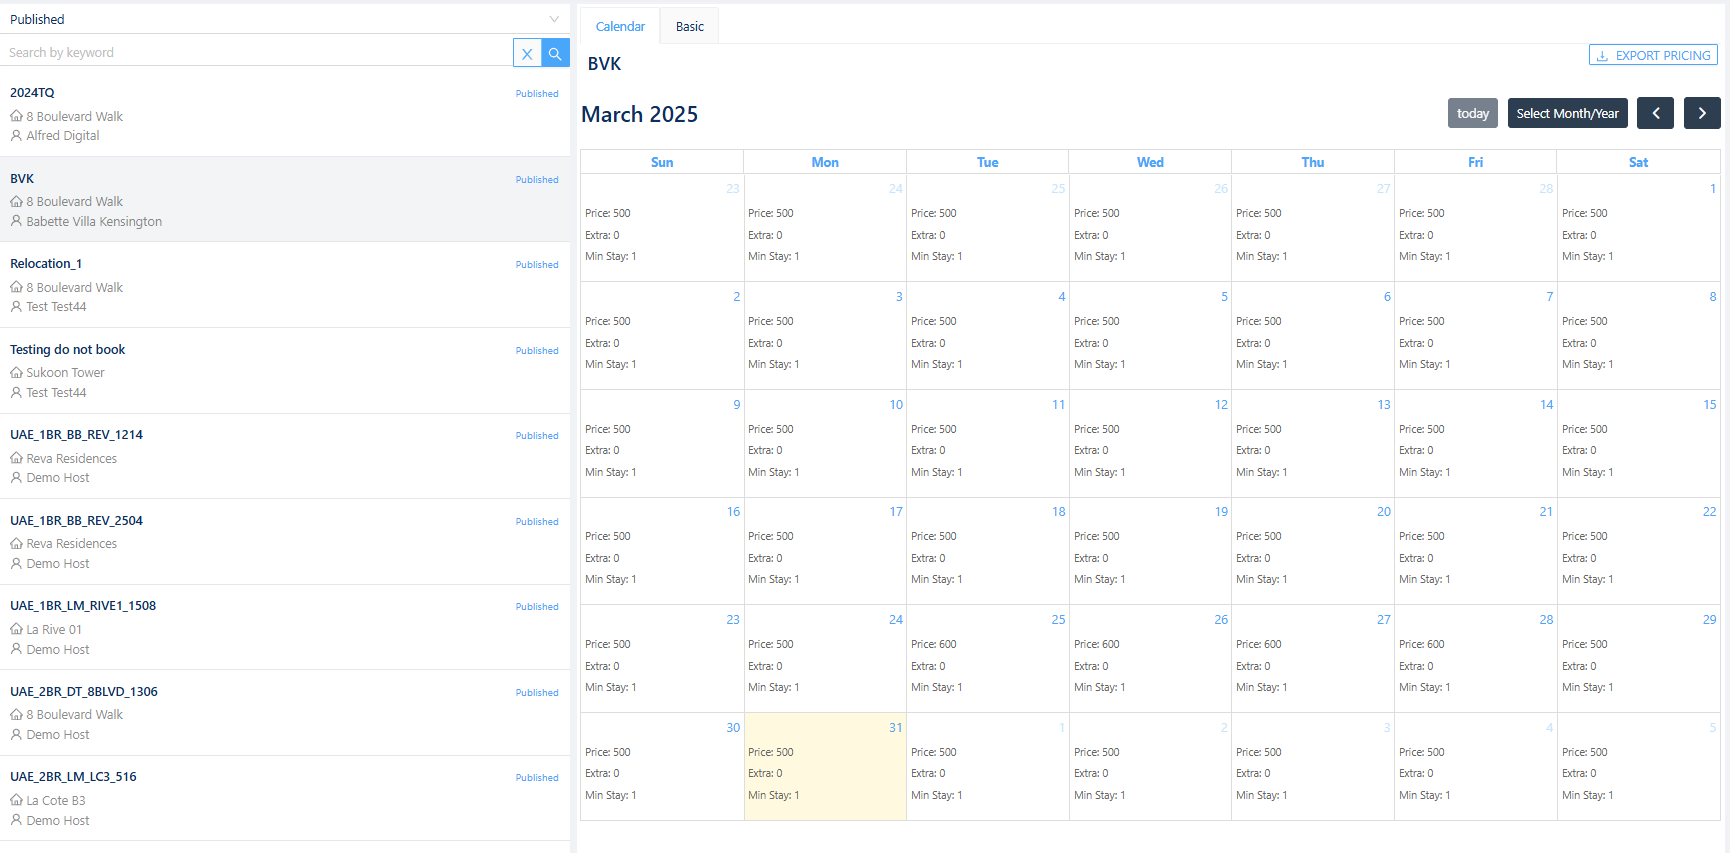
🏠 Step 6: Add & Configure Properties
- Go to:
Properties module → Properties submodule - Click the “Create Property” button
- Fill in the required sections:
- Basic Information (assign a Host; system will prompt to create one if missing)
- Listing content & metadata
- Operational details
- Financial settings
- Fee & tax configuration
- Integration settings (PriceLabs, payment gateways, etc.)
🚨 If you opted for full onboarding: send property info and images to your CS rep, and they’ll recreate them in the PMS and connect them to OTAs.
🔗 Related article: Property creation guide
🌐 Step 7: Connect Your OTAs
- Go to:
Sales Channels module - Click “Add Connection” and select your OTA: Airbnb, Booking.com, Expedia, Ostrovok, Agoda
- Follow the step-by-step instructions for mapping your listings
🎥 Video support available: Setting up a channel connection
🔗 Related article: Setting up Channel connections
⚠️ Tip: Ensure fee and tax configurations match exactly between the PMS and OTAs to avoid booking breakdown discrepancies.
🔔 Step 8: Configure Alerts & Notifications
Set up who gets notified and when:
- Admins or internal users
- Guests
- Property owners
- Tower security
- Navigate to:
Admin module → Alerts submodule - Choose your alert types and recipients
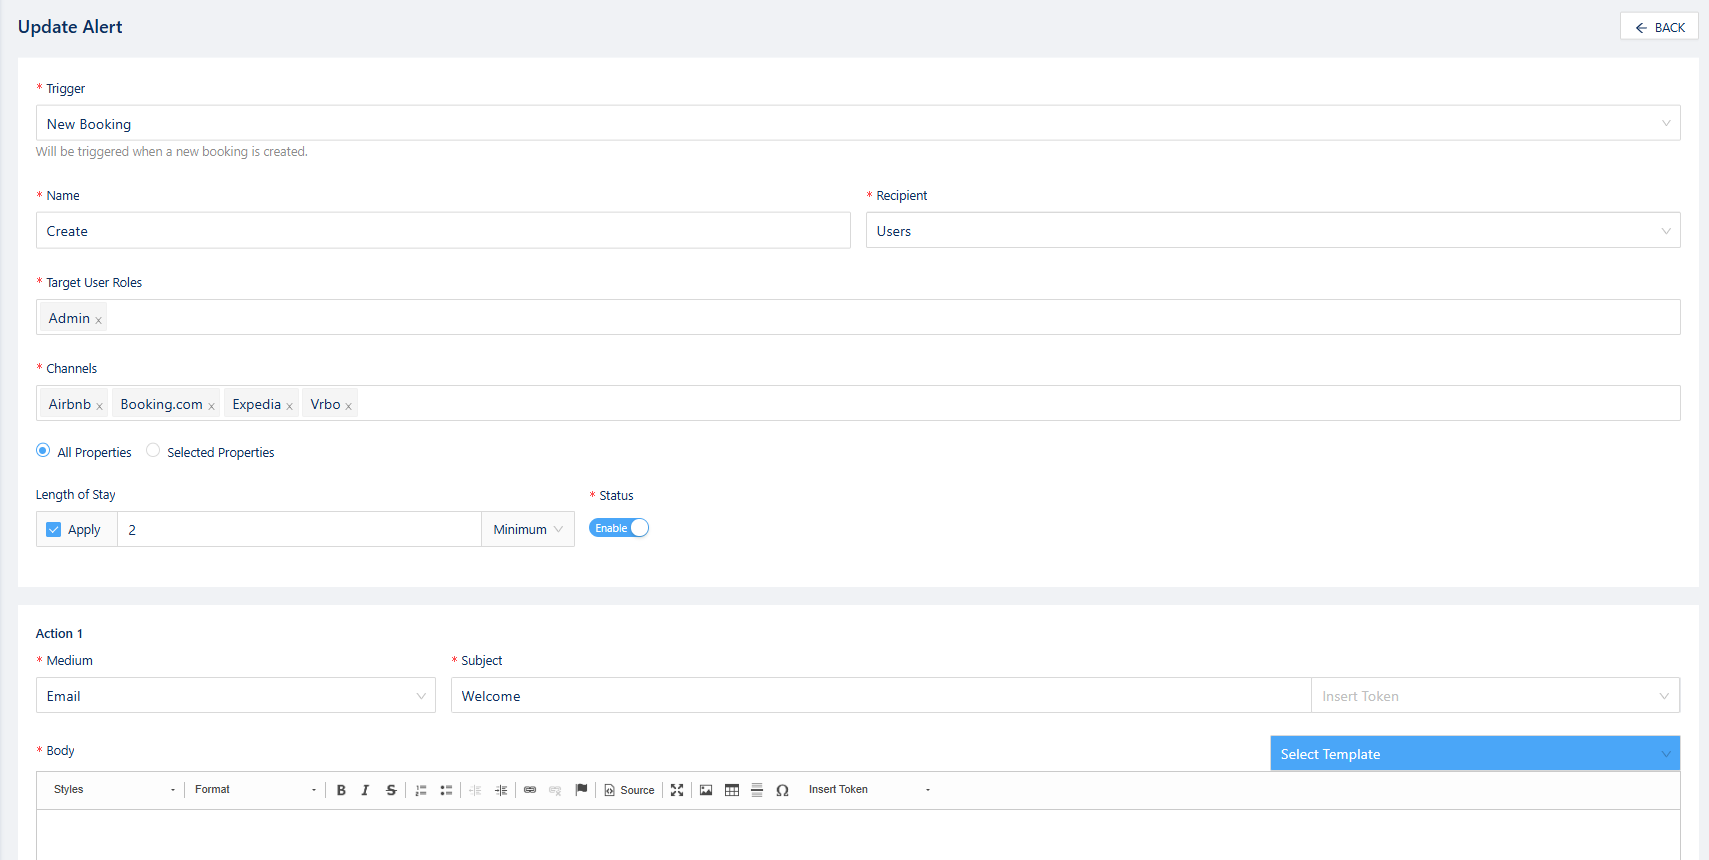
🔗 Related article: Customizing system alerts
💰 Step 9: Set Up Pricing
You can either:
- Manually configure pricing via the
Revenue module, or - Integrate with a pricing tool like PriceLabs
🔗 Related article: Setting your rates manually or setting up PriceLabs
📃 Additional Resources
- 🎓 mr.alfred OS onboarding & training tutorials
- ❓ FAQs
- 😊 Contact your CS rep for personalized help
